In this article, we will look at the most difficult and fascinating type of tests in our community – text quests, also simply called quests.
These tests differ from the others in that each subsequent question directly depends on your answer to the previous one. This feature allows you to create a branching plot and make each passage unique.
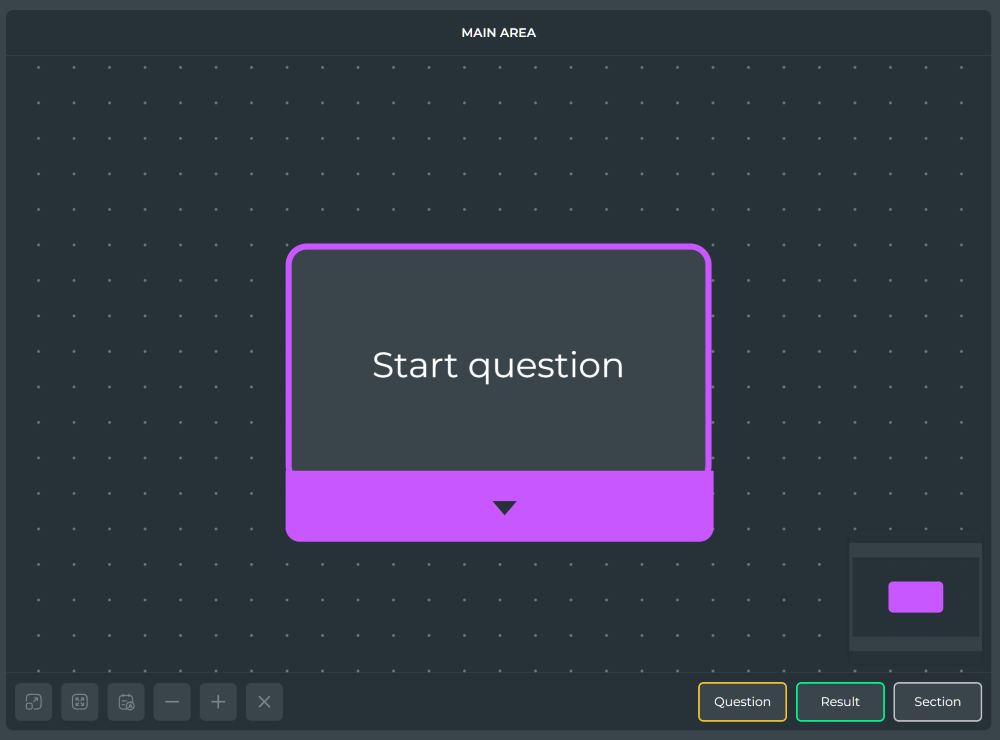
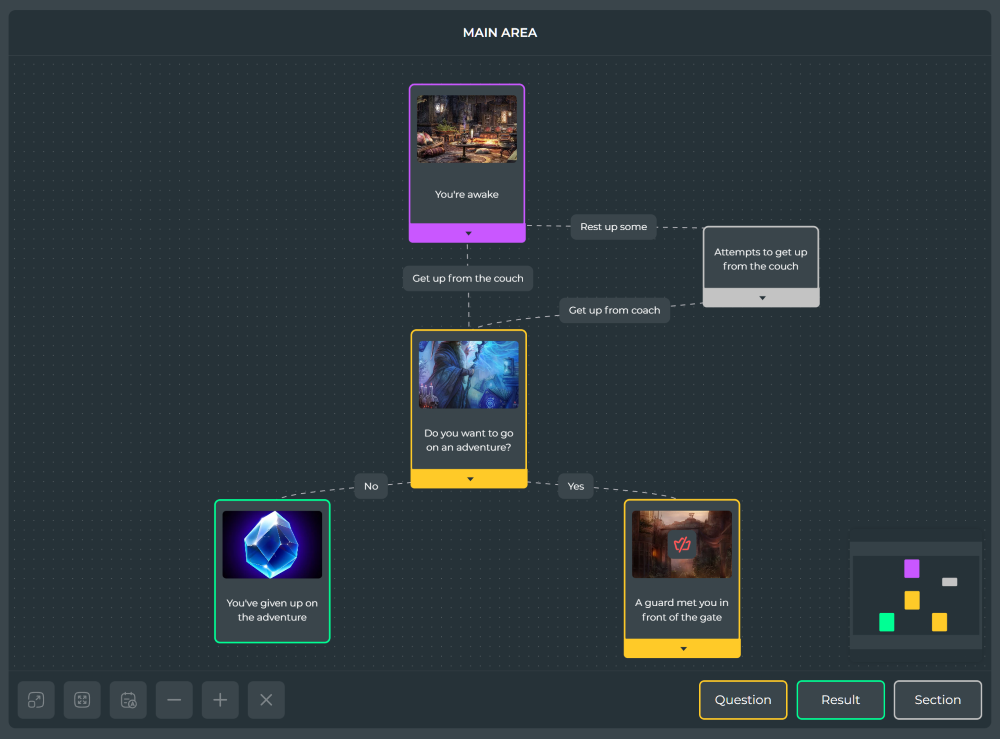
When you are on the text quest editor page, there will be only an empty canvas in front of you with a single narrative element "Starting Question".
This element serves as a starting point in any story, and the canvas is a schematic visualization of the structure of your test.
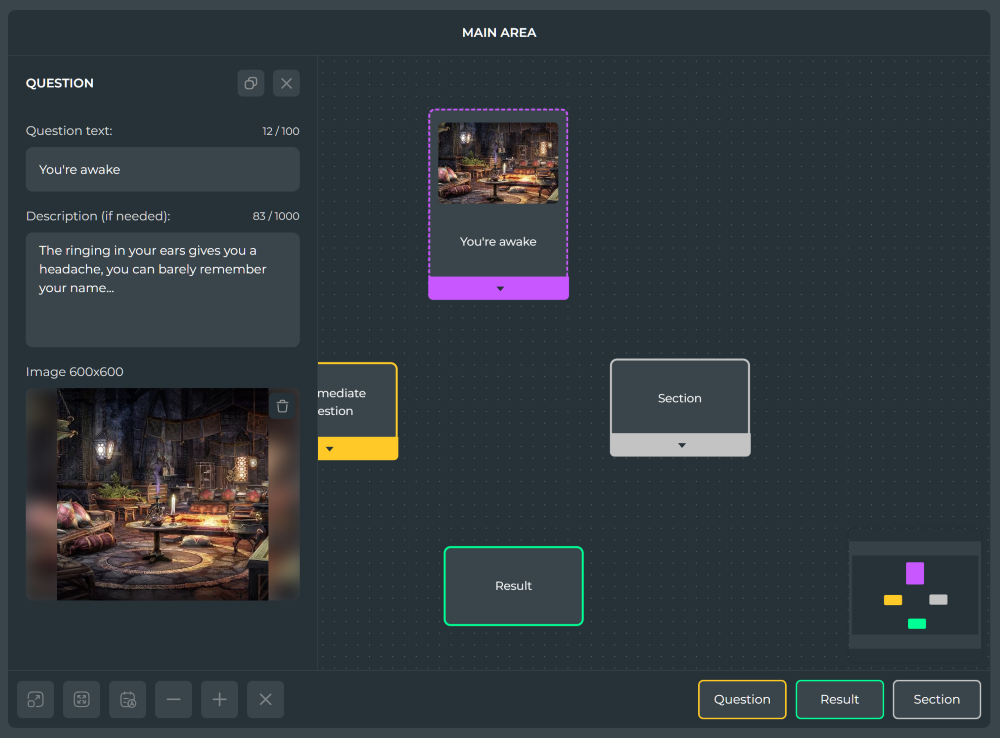
In addition, in the lower right corner of the screen you can see the elements "Question", "Result" and "Section", each of which can be dragged onto the editor's canvas, thereby adding it to the plot. Let's take a closer look at the "Question" and "Result", and leave the "Section" for now for last:
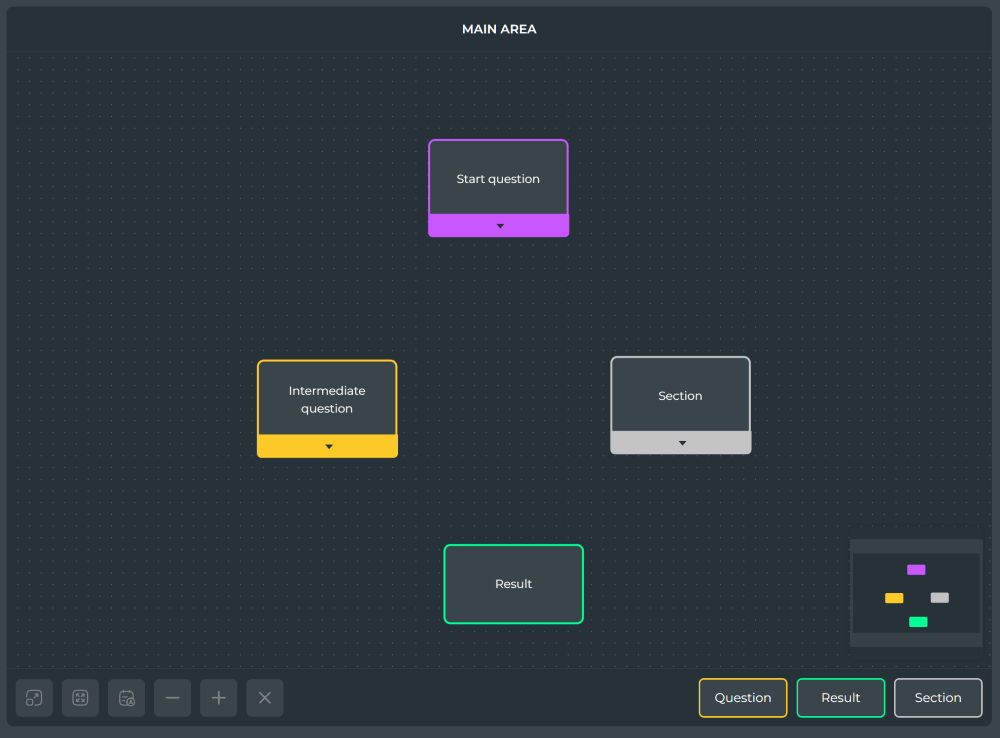
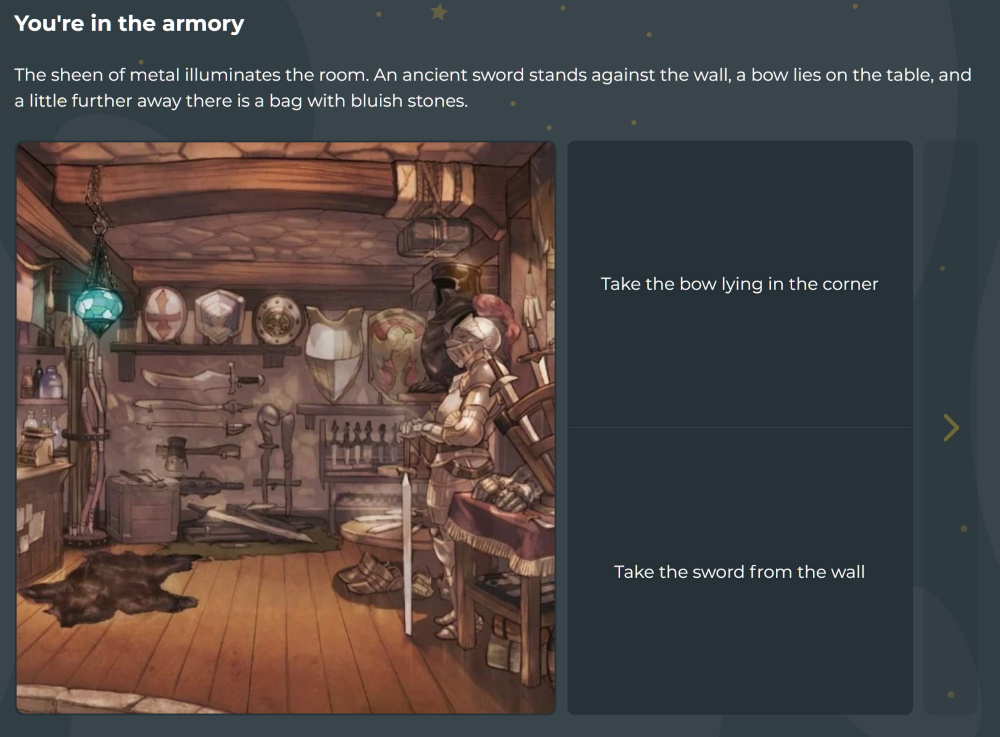
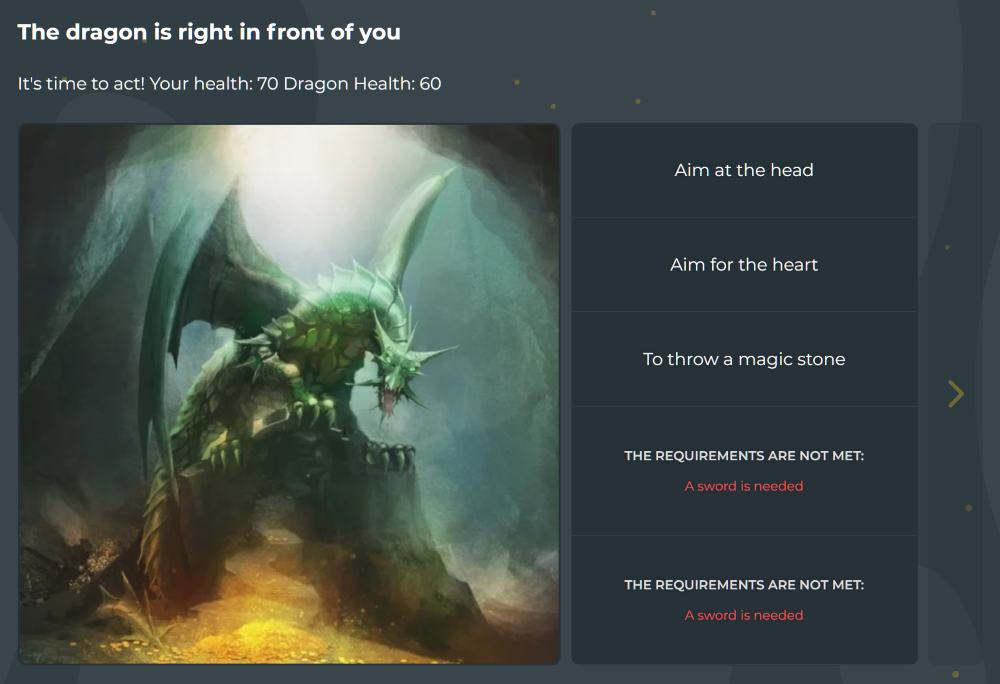
The "Question" is the basic component of any test. When passing the test, the player answers the questions by seeing their title, description, illustration and possible answers on the screen. The "starting question" does not differ from the usual question in anything other than the color in the editor.
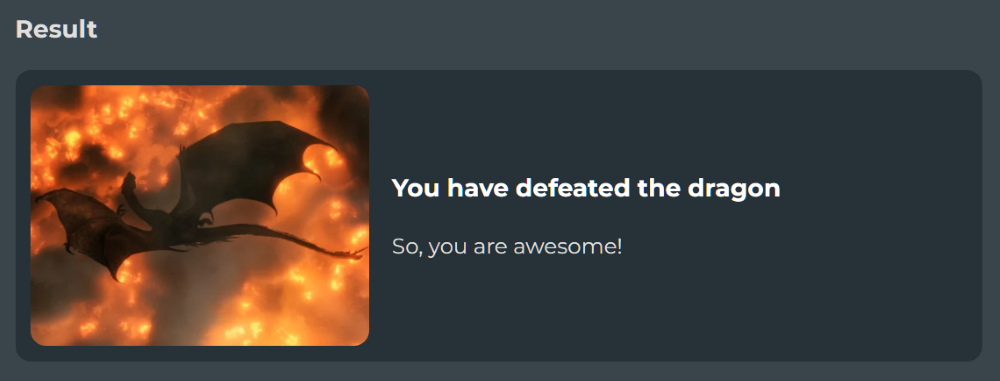
"Result" - as well as questions is a mandatory element. This is the ending of your story, the element of narration that will lead the user to the final screen and the passage will be completed. Any story quest should have at least two results, but the more of them, the more interesting it will be to pass your test over and over again, in search of a way to another result.
After adding an element to the canvas, you can adjust its parameters depending on the type of element, for example, you can assign a title, description and illustration to the question that the user who passes your test will see.
You can do this at any time by simply clicking on the element, after which its options panel opens. There you can also copy and delete narrative elements using the appropriate buttons.
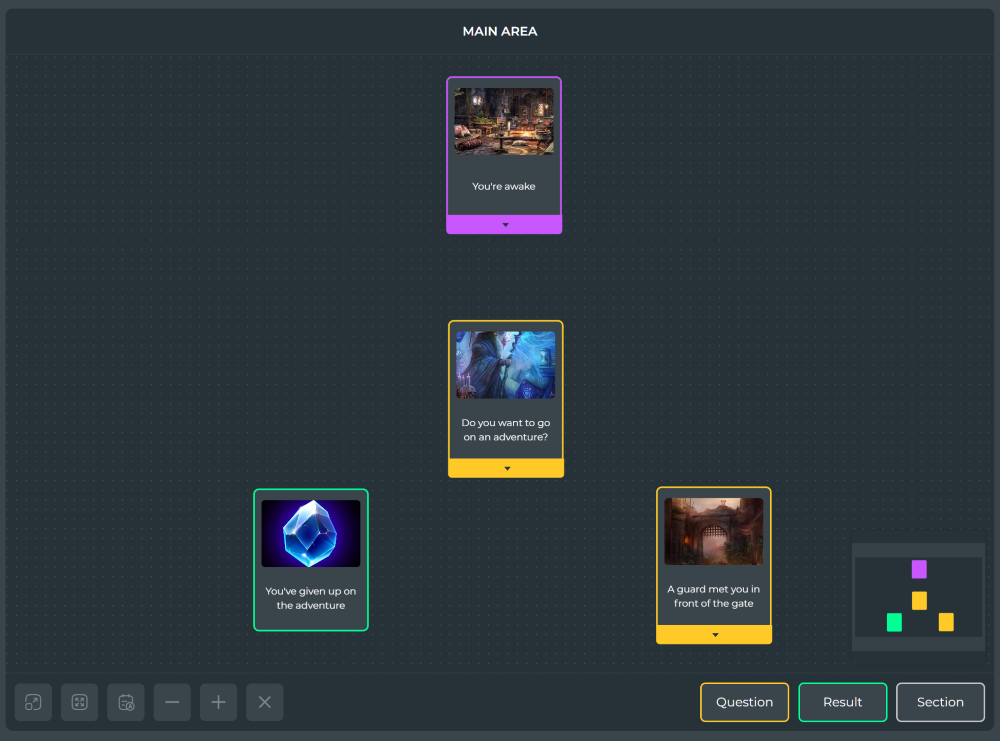
So, let's say you have added a couple of narrative elements to the canvas, but this is not enough: there must be a logical connection between each element of the narrative. The means by which the player will move between them. We use answers to questions as such a tool.
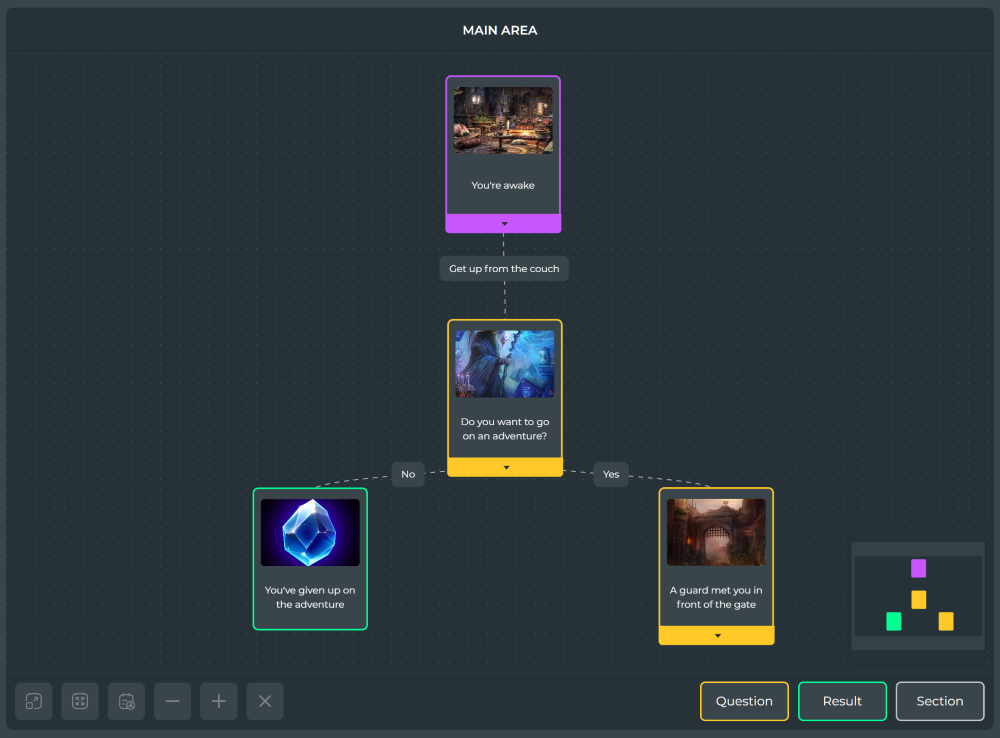
Pay attention to the questions on the canvas: they have a lower border with an arrow icon. By pulling on it, you will see a line from the selected element, and other elements of the narrative will display places where you can connect it. Pull the line to the desired element and release it, a dotted link will appear on the canvas between the connected elements with an animation of the direction of this connection, and an "Answer" will be created in the middle.
It will be displayed as one of the options for the question from which the connection originates, and when you select this answer during the passage, you will switch to the target element.
You can edit the answer parameters in the same way as other narrative elements by clicking on it.
Having summed up everything described above, you can already create a simple narrative structure: add the desired number of questions, link them with answers and bring each chain to its result. Keep in mind: the more plot options you come up with and the wider the user's choice of answers, the more interesting your quest will be.
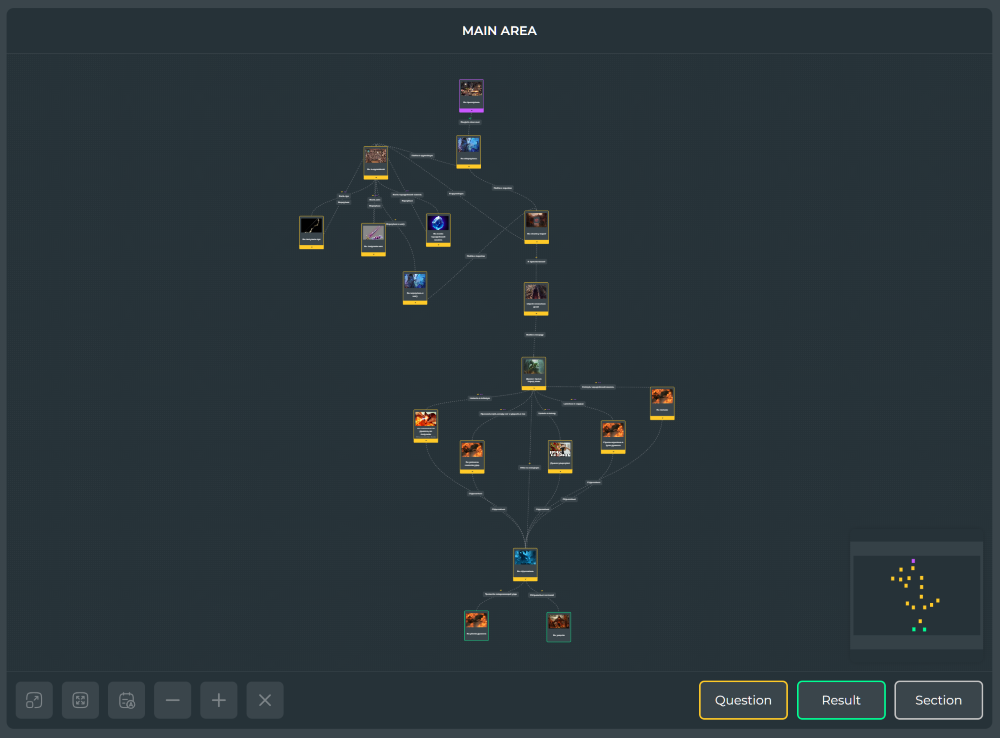
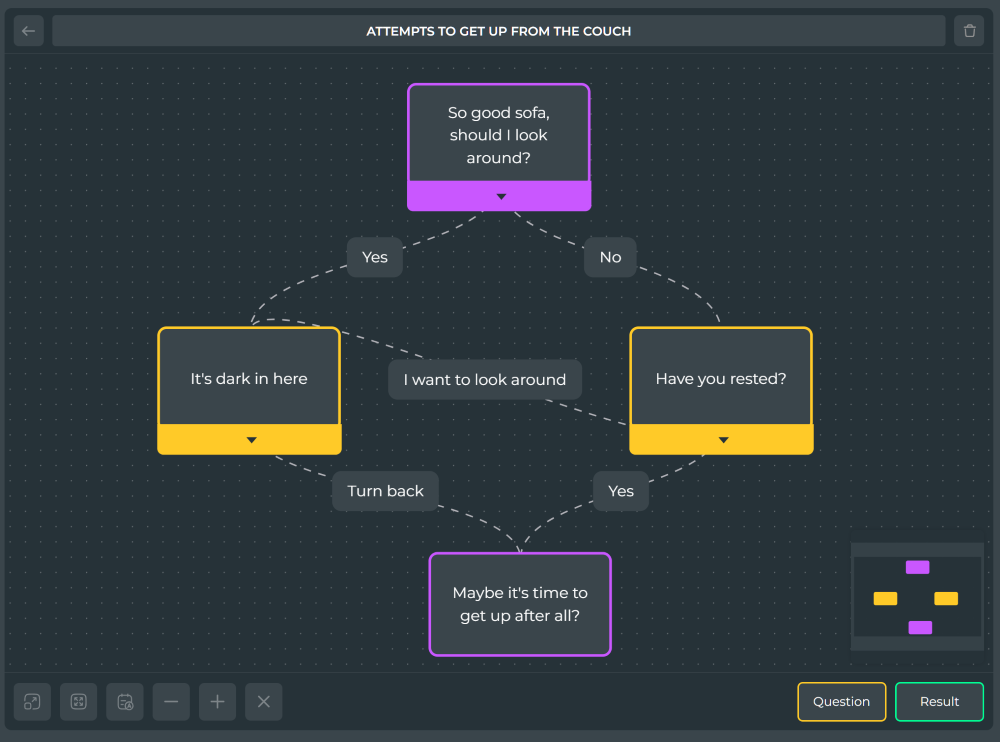
Finally, it's time to figure out what a "Section" is. There are cases when you got carried away with developing your story and did not notice how you created a huge narrative structure, which is simply difficult to follow, and when the canvas is removed, the device begins to glitch due to the large number of elements on the screen.
In such cases, the "Section" element will help you, which is a separate nested space for your plot elements. To draw an analogy, a section is a folder on the desktop of your gadget: you put files there that you don't want to see on the home screen.
To view the contents of a section, you can open its canvas by simply clicking on it. To exit the canvas section, there is a button with an arrow in the upper left corner of the screen.
Inside the sections, you can arrange entire branches of the plot by connecting it to the questions on the main canvas. The only caveat: the section must be added to the canvas in advance, since it is impossible to drag existing elements into it.
Now, using all this knowledge, you can create large and complex plots. But what if that's not enough for you and you want to make the test more interactive? For example, ask the user his name in order to use it in the texts of the questions, or store and use information about how many apples he plucked from the tree on that question about the orchard? While you were reading this, did you have any new ideas?
Then it's time to dive into the concept of "Attribute" and the functionality associated with it.
So, what is an "Attribute"? For ease of understanding, let's say that this is a figurative cell that stores information for passing the test, but it will be easier to figure out an example.
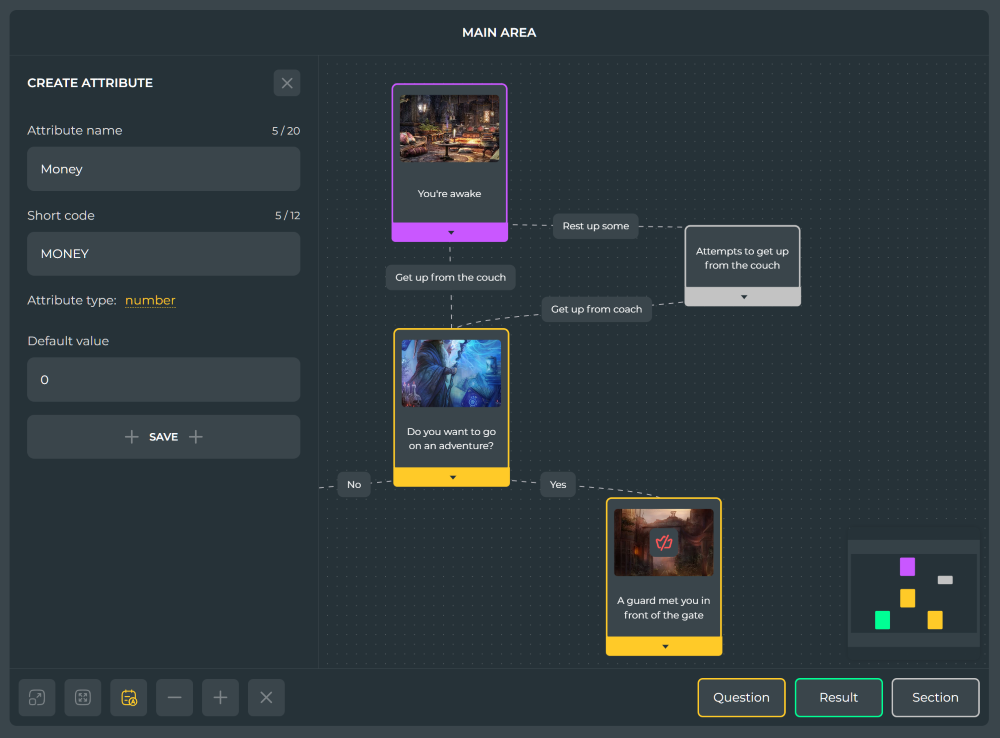
Imagine that we want to create a trading system in our narrative and for this we need to somehow store the current amount of money from the player in order to check whether he can buy, say, an apple. We can create an attribute in the test, name it MONEY and assign it a value by default (at the beginning of the passage), for example 0. During the course of the story, when choosing answers, we can change the value of this attribute, for example, if one of the questions is answered correctly, we will add 10 coins to the player's current value, which is just enough for an apple. Then, in the following questions, we can check the value of this attribute and make the answer with the purchase of apples available. If the player decides to buy one or more apples, and for the subsequent plot it is important how many apples are in his pocket – you can create another APPLES attribute and assign it a value for this answer.
And in short: attributes allow you to store, change and display your meaning in the text of plot elements, as well as block answer options. At the same time, for each player, with each passing of the quest, the attribute values will be separate (that is, they will not be transferred from another passage).
Let's learn how to create attributes: open the attributes menu with the button with the "A" icon in the lower left corner of the editor. When you click the "Add attribute" button, you can assign it a name (displayed in the editor and when passing the test), a short code (used in the editor), the attribute type (string or number) and its default value, which will be assigned to it at the beginning of the passage (if necessary).
Attribute types differ in purpose: if you want to use mathematical functions in relation to the attribute value, choose "number", if not, the "string" type is suitable.
Any actions with attributes are triggered by the player, which means they occur when answering questions. Based on this, the interface for actions with attributes is located in the parameters of the "Answer" narrative element. Open the parameters of any answer on your canvas to see the available actions.
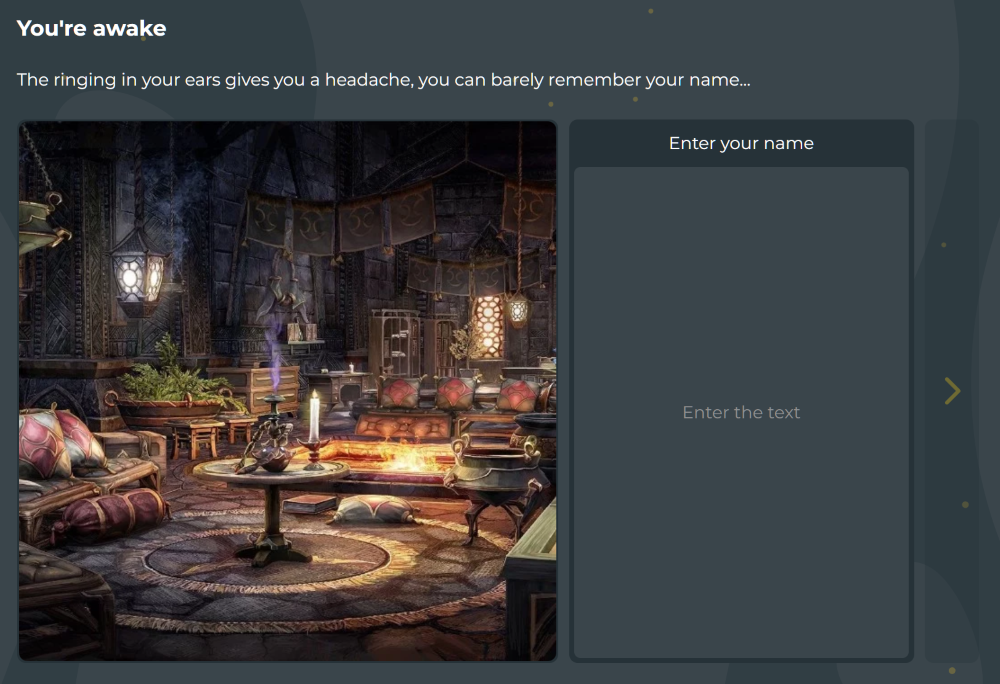
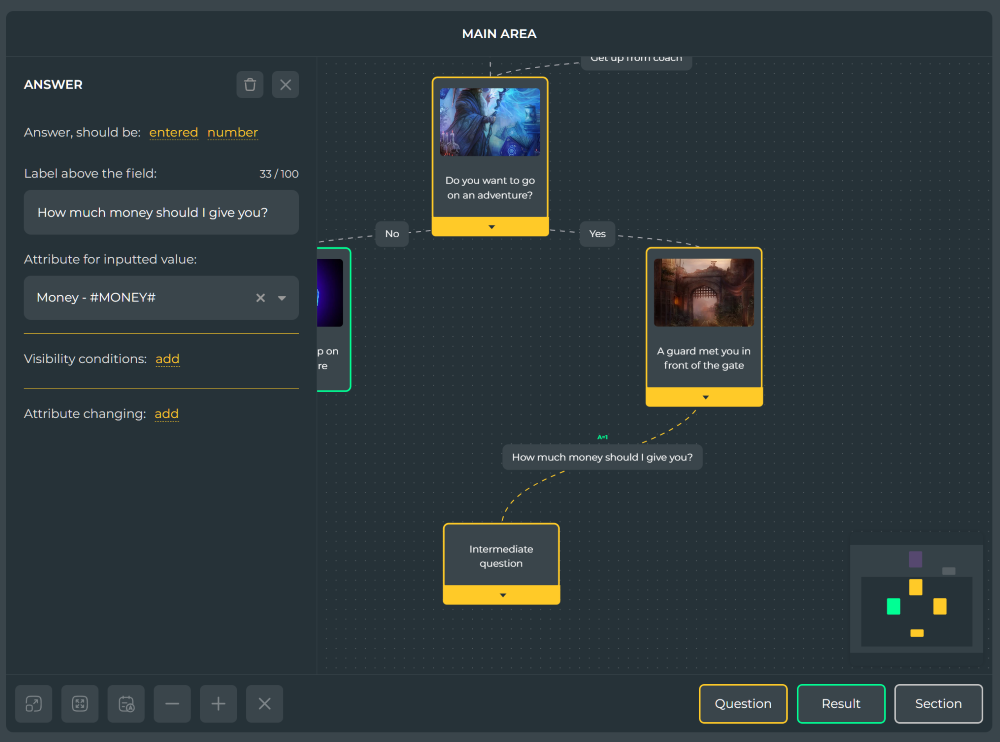
Instead of simply selecting an answer, you can let the player enter a value and save it to an attribute for later use. To do this, switch the answer to the "Answer should be entered" mode and select the attribute type, as well as the attribute in which you want to store the inputted value.
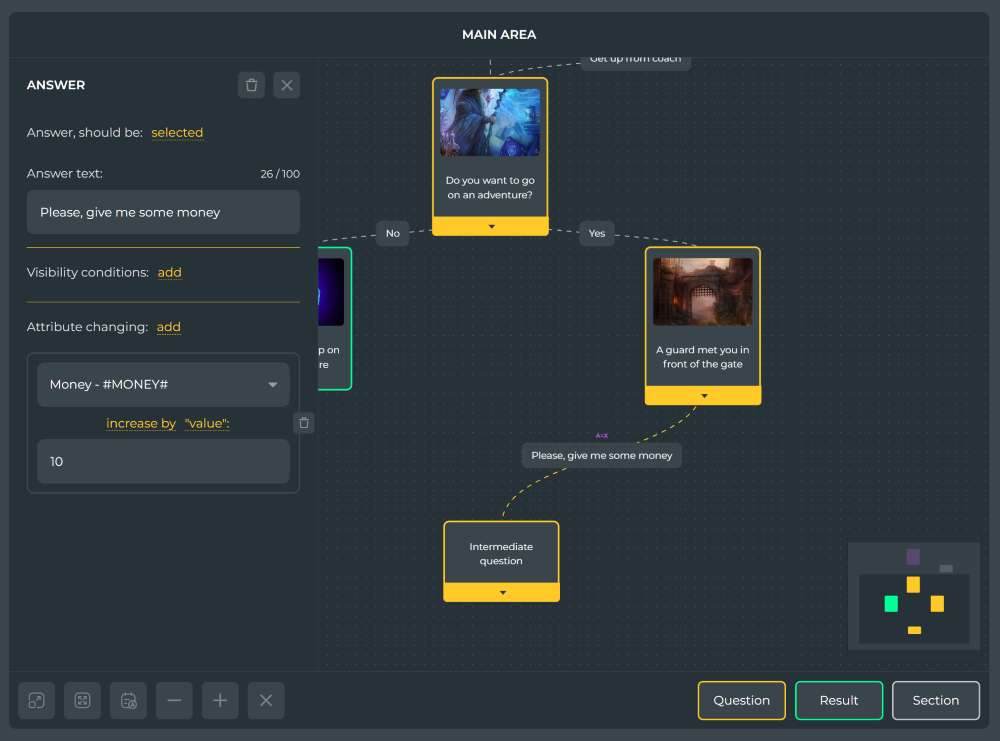
Also, when a player selects or enters an answer, you can put a change in the attribute value on the prepared one using the "Attribute changing" item. By adding an attribute to change, you can assign a new attribute value, as well as use mathematical functions (increase/decrease, etc.) for numeric attributes.
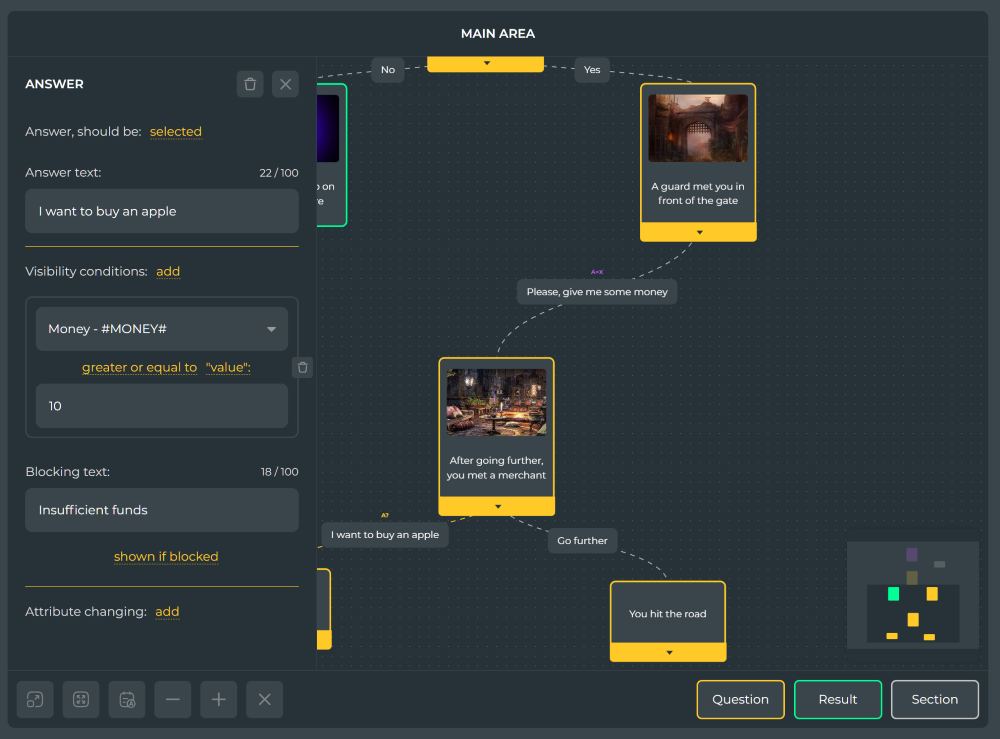
Alternatively, you can allow the player to choose an answer option only under certain conditions. To do this, use the "Visibility conditions" item, setting an attribute and a comparison method in it. For lowercase attributes, only the "value is equal" and "value is not equal" methods are available, whereas for numeric attributes, the mathematical operators "greater than", "less than" and the like are also available. You can add multiple conditions using the logical operators "AND" and "OR" between them to control whether all conditions or one of them must match.
The answer with the assigned display conditions will be blocked by default, but is available if the assigned conditions match. You can control the display of the text of the blocked answer using the "Blocking text" field, or hide the answer altogether by switching it to the "not shown if blocked" mode.
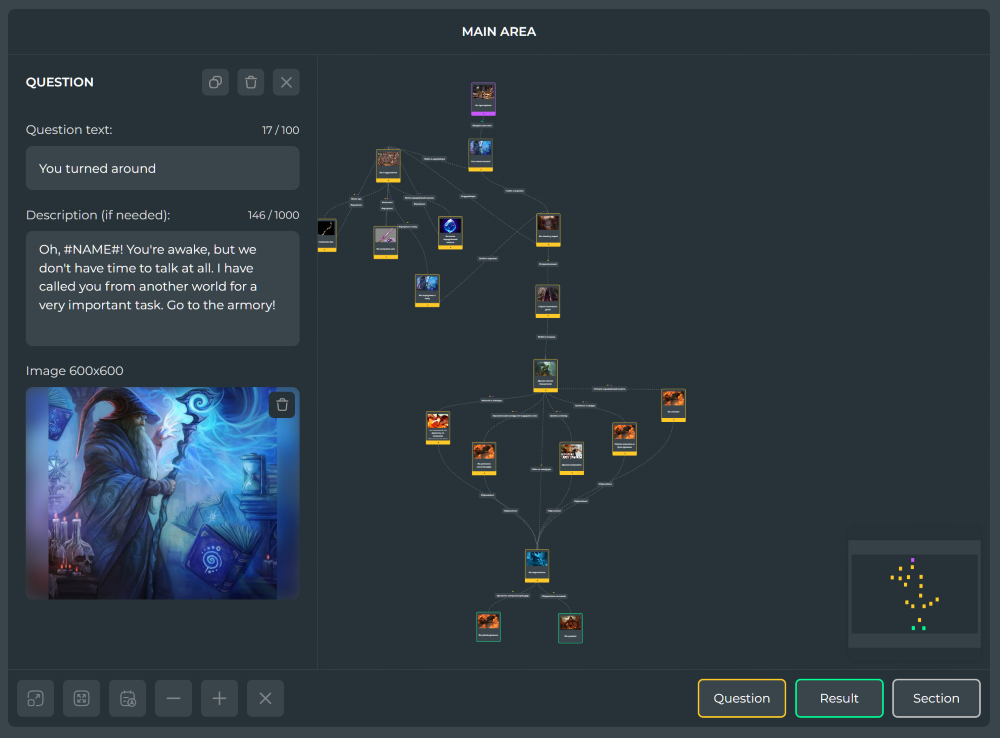
You can also use the current attribute values in the texts of your narrative elements, for example, in the title of the question, the text of the answer or the description of the result. To do this, simply insert the short code of your attribute into any text and wrap it with the # sign.
For example, we asked the player what his name was and saved the entered value in the NAME attribute. Now we can use it in the text of the following questions as follows: "Hello, #NAME#! Glad to meet you." The player will see the name he entered earlier instead of #NAME#.
We're done! Now you know everything you need to create an epic text game with a non-linear plot and complex mechanics.
Thank you for reading this article. We hope it was helpful.